Oort
— Out of RDF Transmogrifier™
OortPub Tutorial
This tutorial is fully functional.
Last update at 2007-10-30, with:
- Fixed argument to bound_with to be a URIRef (thanks to Mikael Högqvist for reporting this).
Contents
Intro
The purpose of this tutorial is to guide you through the initial stage of building a web application with OortPub. Our goal is to publish a Graph with some personal info as a coherent website.
In short, we will go through the following steps:
- Create the necessary files and directories for a web app.
- Setting up a Graph containing the RDF we want to build the site upon.
- Repeatedly until satisfied:
- Adding the RdfQuery code to get at our desired data.
- Creating Genshi templates to render this data.
- Declaring the display code to match resources with queries and templates.
This tutorial assumes that you're familiar with Python, RDF (Notation 3) and web technologies such as XHTML and CSS. It also assumes you're running some flavour of unix (if not, YMMV). Finally, it is based on OortPub 0.1 or later, so please upgrade if you were an early adopter..
Start
Installation
Run:
$ sudo easy_install OortPub
For information about EasyInstall, see its webpage at the PEAK website.
Initializing the Project
Run:
$ paster create -t oort_app
Fill in desired values in the dialogue (use "myapp" as name to follow the example here). Then proceed with:
$ cd myapp/
The generated layout should look like:
$ ls
data            htdocs          myapp           myapp.egg-info  setup.cfg
setup.py        webapp.ini

$ ls myapp
__init__.py     queries         ns.py           view            viewer.py

$ ls myapp/queries/
__init__.py

$ ls myapp/view/html
layout.xhtml    unknown.xhtml
Open the file viewer.py and study its content for a second:
# -*- coding: UTF-8 -*-

#=======================================================================
import rdflib
from oort.sitebase import ResourceViewer, Display, Aspect

#from myapp.queries import *
from myapp.ns import *
#=======================================================================


class MyappResourceViewer(ResourceViewer):

    resourceBase = "http://myapp"
    trailSep = "/"

    langOrder = 'en',

    class HtmlDisplay(Display):
        name = "html"
        default = True
        outputMethod = 'xhtml'
        contentType = 'text/html'
        outputEncoding  = 'iso-8859-1'
        templateBase = "myapp/view/html"
        globalQueries = {}
        aspects = [
                Aspect(RDFS.Resource, "unknown.xhtml", {}) ,
                #Aspect(FOAF.Person, "person.xhtml", {}) ,
                #Aspect(FOAF.Document, "webpage.xhtml", {})
            ]


def graph_factory():
    graph = rdflib.Graph()
    return graph
Now, make sure that nothing is running on port 8080 on your machine (or edit webapp.ini to change that port), and then run:
$ paster serve webapp.ini
Visit http://localhost:8080/. You should be redirected to a page with an output similar to:
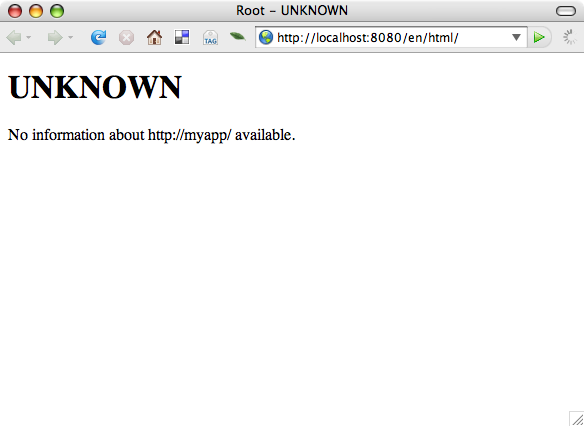
It is obvious that we're a little short on data right now.
But before we begin, let's have a quick look at..
The Paste Deploy File
webapp.ini is a plain PasteDeploy file. It is set up for development, and these are the relevant parts, in turn:
This for using PasteDeploy scripts as executables:
#!/usr/bin/env paster
#========================================
[exe]
command = serve
daemon = false
reload = true
#========================================
Use the simple http server coming with Paste for development:
[server:main]
use = egg:Paste#http
host = 127.0.0.1
port = 9070
Define the main application as a composite of "myapp" and "htdocs", mounted at "/" and "/htdocs", respectively:
[composite:main]
use = egg:Paste#urlmap
/ = myapp
/htdocs = htdocs
Define a "dev" application, similar to main, but tailored to suite rapid development. Specifically, you may wish to change what handles the static files in production (in composite:main above), but probably keep this simple setup for development. This also uses myapp-dev instead of myapp (see below for details):
[composite:dev]
use = egg:Paste#urlmap
/ = myapp-dev
/htdocs = htdocs
This is your primary application, which points at a factory for WSGI applications in your own project's viewer.py. It also points to a "graph_factory", which is used to get at the Graph you've chosen as the data layer of your app:
[app:myapp]
paste.app_factory = myapp.viewer:MyappResourceViewer.app_factory
graph_factory = myapp.viewer:graph_factory
Next comes myapp-dev, which uses myapp but with a different setup. reload_templates = True makes the Oort app reload your Genshi templates when they are modified, instead of caching them for the entire uptime. Furhermore, the evalerror filter is used here (read on for details):
[app:myapp-dev]
use = myapp
reload_templates = True
filter-with = evalerror
This utility, included in Paste, is a straight-forward file serving WSGI app:
[app:htdocs]
use = egg:Paste#static
document_root = %(here)s/htdocs
This is the filter used by the "dev" application. It is excellent for development, providing you with an interactive environment directly in the browser if an exception is thrown (something you don't want in production though). Courtesy of Paste, of course:
[filter:evalerror]
use = egg:Paste#evalerror
That's all about Paste for now. Let's get to the core of Oort applications: RDF data.
All Your Data
An Example
For this tutorial, download the archive:
Parts are written in the Notation 3 format, which I strongly urge you to learn to fully experience the more lightweight and powerful aspects of RDF.
Then, pack up the contents into your project (filling the folder "data/"), like:
$ tar xzvf myapp-rdf_data.tar.gz
$ ls data/
content     core.n3     persons.n3  projects.n3 topics.n3
$ ls data/content/
about.rdf    main.rdf     news.rdf     persons.rdf  projects.rdf topics.rdf
Add this import statement in viewer.py:
from oort.util.graphs import load_dir
and change the graph_factory function into:
DATA_PATH = 'data'

def graph_factory():
    graph = rdflib.ConjunctiveGraph()
    def handle_load_error(e, fpath):
        print "error in %s" % fpath
    load_dir(graph, DATA_PATH, errorHandler=handle_load_error)
    return graph
What's In the Data?
The example RDF contains both general and "internal" ("site specific") content. The general content describes a group of productive, made-up people and a couple of article summaries, some fictive projects and artifacts.
The internal set describes some things in your site, namely a app:SiteNode, which symbolize the artificial concepts of a web page and/or folder in this particular example. These are related to each other by some topics, which are also described.
Persistent Graphs
Oort doesn't currently do much for management of your Graph. Some stuff is developed to facilitate certain approaches, but in general, you are left to use editors and RDFLib by itself for this.
Setting up and using RDFLib with a back-end such as SleepyCat's Berkley DB is very simple, but I will not go through that now. However, this is the recommended way to do it (and a tutorial for that may follow).
Viewing It
A ResourceViewer instance constitutes a WSGI application. It works by mapping a request URL to a proper resource URI in the Graph it's using, and then dispatching to one Display by means of view arguments, which will further process the resource and render some output of it (called an "Aspect" of the resource). Apart from the resource, the URL will contain which language and named display to use for viewing it.
There are serious plans for changing or at least customizing the nature of the current URL handling. In regard to persistent URI practises and REST style, the current approach (of having language and display as part of the URL) may seem brittle. This is another discussion though. Just bear in mind that this part is under "architectural re-evaluation".
Getting the Parts
Now, in order to fetch data from the RDF Graph and provide it in a convenient form to the templates, we will use the second important part of Oort: oort.rdfview. This module provides an RdfQuery class, which you can subclass to create declarative queries to be used with a graph.
Along with this is a bunch of helper classes and functions which are used together to compose queries (or views, or facets..) for data about resources.
Prepare for everything by adding our used namespaces to myapp.ns. It should end up like:
from rdflib import Namespace, RDF, RDFS

DC = Namespace("http://purl.org/dc/elements/1.1/")
DCT = Namespace("http://purl.org/dc/terms/")
FOAF = Namespace("http://xmlns.com/foaf/0.1/")
DOAP = Namespace("http://usefulinc.com/ns/doap#")
SKOS = Namespace("http://www.w3.org/2004/02/skos/core#")
APP = Namespace("http://myapp.example.org/ns/2006/10/app#")
The sitenodes, as seen in the example data, contain (references) resources that are either Articles or other SiteNodes. They also have a title, description, one or more subjects, along with an optional owner responsible for its content.
We will add all queries for your application in the package myapp.queries (i.e. in its __init__.py file).
In Oort, this becomes (with some basic queries declared first):
from oort.rdfview import *
from myapp.ns import *

class Labelled(RdfQuery):
    label = localized(RDFS)

class Titled(Labelled):
    title = localized(DC)
    altTitle = localized(DC.alternate)

class SiteNode(Titled):
    nodeContent = localized_xml(APP)
    subNodes = each(APP.subNode) >> Titled | Sorter('title')
    subjects = each(DC.subject) >> Labelled

class WebSite(Titled):
    title = localized(DC)
    startNode = one(APP) >> SiteNode
    toc = collection(APP) >> Titled
    @property
    def altTitle(self):
        return self.startNode.altTitle
Displaying an Aspect
Now, to view the WebSite and its SiteNode contents, we have to create templates for rendering them.
Edit the file view/html/layout.xhtml and replace its content with:
<?xml version="1.0" encoding="utf-8"?>
<html xmlns:py="http://genshi.edgewall.org/"
    xmlns:xi="http://www.w3.org/2001/XInclude"
    xmlns="http://www.w3.org/1999/xhtml"
    xml:lang="${app.current.lang}" lang="${app.current.lang}">
    <head>
        <title>${site.title} - ${title_content()}</title>
        <meta http-equiv="Content-Type" content="text/html; charset=iso-8859-1"/>
        ${head_content()}
    </head>
    <body>
        <div class="nav">
            <ul py:with="items = [site] + site.toc">
                <li py:for="node in items">
                    <em py:strip="app.current.resource != node.uri">
                        <a href="${app.link(node)}">${node.altTitle or node.title}</a>
                    </em>
                </li>
            </ul>
        </div>
        <div class="bodyContent">
            ${body_content()}
        </div>
    </body>
</html>
Create sitenode.xhtml in the same directory:
<?xml version="1.0" encoding="utf-8"?>
<py:with xmlns="http://www.w3.org/1999/xhtml"
        xmlns:xi="http://www.w3.org/2001/XInclude"
        xmlns:py="http://genshi.edgewall.org/">

    <py:def function="title_content">${node.title}</py:def>
    <py:def function="head_content"></py:def>

    <py:def function="body_content">
        <h1>${node.title}</h1>
        ${node.nodeContent}
        <div class="subNodes">
            <ul>
                <li py:for="node in node.subNodes">
                    <a href="${app.link(node)}">${node.altTitle or node.title}</a>
                </li>
            </ul>
        </div>
    </py:def>

    <xi:include href="layout.xhtml"/>
</py:with>
Then simply reuse that for website.xhtml for now (this could of course be something much more sophisticated for a real start page):
<?xml version="1.0" encoding="utf-8"?>
<py:with xmlns="http://www.w3.org/1999/xhtml"
        xmlns:xi="http://www.w3.org/2001/XInclude"
        xmlns:py="http://genshi.edgewall.org/"
        vars="node = site.startNode">
    <xi:include href="sitenode.xhtml"/>
</py:with>
Now open myapp/viewer.py again and uncomment:
from myapp.queries import *
Then edit the MyappResourceViewer to acommodate these new templates. Replace the commented Aspect entries with:
Aspect(APP.WebSite, "website.xhtml"),
Aspect(APP.SiteNode, "sitenode.xhtml").using(node=SiteNode),
Create a constant with the base URI used in the example data, and use it as the resourceBase for your ResourceViewer:
MYAPP_BASE_URI = "http://myapp.example.org/"

class MyappResourceViewer(ResourceViewer):

    resourceBase = MYAPP_BASE_URI
Also, edit globalQueries to supply the global site info:
globalQueries = {
        'site': WebSite.bound_with(rdflib.URIRef(MYAPP_BASE_URI)),
    }
As mentioned earlier, the Paste Deploy file webapp.ini defines a development application called dev. I suggest you run the development with this:
$ paster serve webapp.ini --reload -n dev
If doing so, the filter evalerror will be used for debugging in browser when an exception occurs, which I find very useful (and impressive!). The --reload makes paste monitor python modules and reloads the application if anything changes.
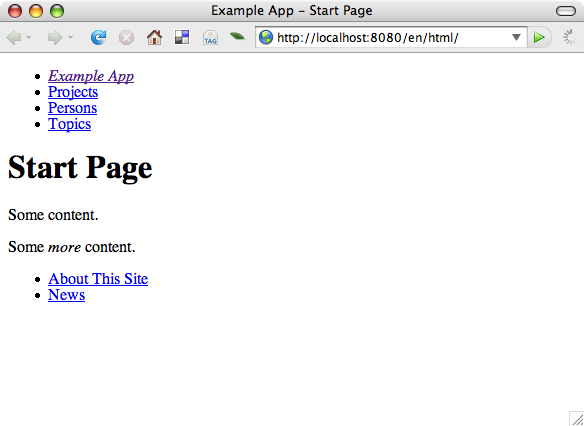
Now go to your browser and hit reload. You should see something akin to:
Connect the Dots
Now we'll add one way to navigate further into the graph. One way is to add a link to the resource which created the currently viewed one. This will presumably be a Person or similary named entity. dc:publisher is present in the data (for the app:WebSite), so it should be enough to add this snippet to layout.xhtml, under the main content:
<div class="footer">
    <py:if test="itemInfo.publisher">
        <strong>Publisher:</strong>
        <a href="${app.link(itemInfo.publisher)}"
                >${itemInfo.publisher.fullname}</a>
    </py:if>
</div>
We don't have any itemInfo in place yet though, nor any logic in place for the different ways people's names can be given. Create new RdfQueries:
class Named(Labelled):
    name = one(FOAF)
    givenname = one(FOAF)
    surname = one(FOAF)
    @property
    def fullname(self):
        return self.name or self._make_full_name()
    def _make_full_name(self):
        if not self.givenname:
            return self.surname
        elif self.surname:
            return self.givenname + " " + self.surname
        else:
            return self.surname

class ItemInfo(RdfQuery):
    type = one(RDF)
    parentNode = one_where_self_is(APP.subNode) >> Titled
    publisher = one(DC) >> Named
Then add ItemInfo to the globalQueries of our ResourceViewer:
globalQueries = {
        'site': WebSite.bound_with(rdflib.URIRef(MYAPP_BASE_URI)),
        'itemInfo': ItemInfo,
    }
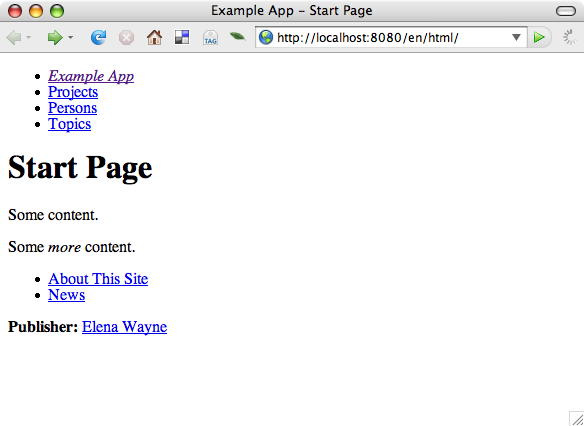
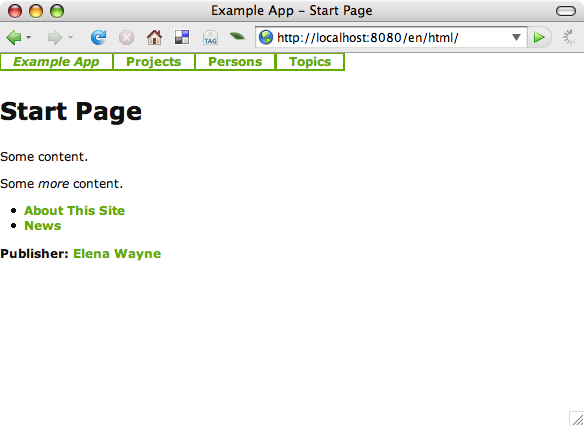
This will check for a dc:publisher for the currenly viewed resource, and create a link to that published if one is present.
This points to a resource for which we have no Aspect, namely a foaf:Person. So let's head on.
Rince and Repeat
Well, repeat; Oort is designed to keep stuff clean automatically.
Now we will add aspects for persons and projects, respectively. First, create the queries for the data we want to get at:
class Topic(RdfQuery):
    prefLabel = localized(SKOS)
    altLabel = localized(SKOS)
    @property
    def topicLabel(self):
        return self.prefLabel or self.altLabel or self.label

class ProjectInfo(RdfQuery):
    name = one(DOAP)
    shortdesc = localized(DOAP)

class Person(Named):
    interests = each(FOAF.interest) >> Topic
    projects = each_where_self_is(DOAP.developer) >> ProjectInfo

class Project(RdfQuery):
    name = one(DOAP)
    shortdesc = localized(DOAP)
    programmingLanguage = each(DOAP['programming-language'])
    categories = each(DOAP.category) >> Topic
    developers = each(DOAP.developer) >> Person
Then, add templates for these.
Create the file view/html/person.xhtml with:
<?xml version="1.0" encoding="utf-8"?>
<py:with xmlns="http://www.w3.org/1999/xhtml"
        xmlns:xi="http://www.w3.org/2001/XInclude"
        xmlns:py="http://genshi.edgewall.org/">

    <py:def function="title_content">${person.fullname}</py:def>
    <py:def function="head_content"></py:def>

    <py:def function="body_content">
        <h1>${person.fullname}</h1>
        <div py:if="person.interests">
            <h2>Interests</h2>
            <ul>
                <li py:for="item in person.interests">
                    <a href="${app.link(item)}">${item.topicLabel}</a>
                </li>
            </ul>
        </div>
        <div py:if="person.projects">
            <h2>Projects</h2>
            <ul>
                <li py:for="item in person.projects">
                    <a href="${app.link(item)}">${item.name}</a>
                </li>
            </ul>
        </div>
    </py:def>

    <xi:include href="layout.xhtml"/>
</py:with>
And put it all into place in your viewer:
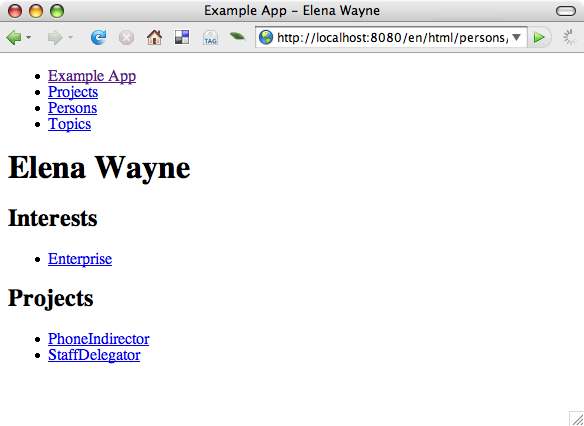
Aspect(FOAF.Person, "person.xhtml").using(person=Person),
Follow the link for the Publisher, and you'll get something like:
We Have the Technology
That is all for now. There is still stuff to do, but I leave that as an exercise. Items missing are:
Render projects and topics
Create a mechanism to display lists of resources of a certain rdf:type. This is a substantial hint for one solution:
class TypeListing(SiteNode):
    useType = one(APP) >> RdfQuery
    @selector
    def instances(self, graph, lang, _s):
        return [ AnyLabelled(graph, lang, subject)
            for subject in graph.subjects(RDF.type, self.useType.uri) ]
    instances | Sorter('anyLabel')
Don't fret though, there is a spoiler further down if you want a possible solution right away..
Final Touches
To test the static part of your web app, create the file htdocs/css/main.css with:
html, body {
    margin: 0; padding: 0;
}
h1, h2, h3, h4, h5, h6, p, ul, ol, dl {
    margin: 1em 0;
    padding: 0;
}
li, dd {
    margin-left: 2em;
}

body {
    font-size: 76%;
    font-family: verdana, helvetica, arial, sans-serif;
    background-color: #fff;
    color: #111;
}

a, a:visited {
    color: #6a0;
    font-weight: bold;
    text-decoration: none;
}
a:hover {
    text-decoration: underline;
}

.nav ul {
    list-style: none;
    margin: 0;
}
.nav ul li {
    display: block;
    float: left;
    padding: 0 1em;
    margin: 0;
    border: 1pt solid #6a0;
}

.nav ul:after {
    content: ""; display: block;
    clear: both;
    height: 1px; padding: 0; margin: 0;
}

div.navFooter {
    margin: 1em 0 0.5em 2em;
}
Reference this in myapp/view/html/layout.xhtml by adding:
<link rel="stylesheet" type="text/css"
      href="${app.baseurl}/htdocs/css/main.css"
      media="screen, print" />
This will make it all so much more beautiful:
If you want, you can make the webapp.ini executable:
$ chmod u+x webapp.ini
$ ./webapp.ini -n dev
Finish
Results
Now since you've read through it all (or skipped ahead), download the resulting application here, completed with solutions to the remaining items mentioned earlier:
Summary
That's all for this basic tutorial. As you may have glimpsed, there are many more advanced possibilities available after creating a foundation such as this. By creating more complex and/or hand-crafted queries/selectors, it is possible to get at very interesting views of data without losing oneself in the different layers of a web app.
Not mentioned here is the simple way of internationalizing an Oort application. It basically boils down to adding values in the desired languages, creating internal resources for labels and such, and of course using the localized selector where appropriate. The rest will, more or less, take care of itself.
The fallback when a value in the expected language isn't found is currently quite random though. Use with caution (and feedback if you need this urgently).
(If you want to walk a little less trodden path, do experiment with the JsonDisplay and one of the fine JavaScript libraries for modern DHTML and Ajax that are out there.)
And we haven't even mentioned the possibilities that a Reasoner added to the Graph would enable..
